Replacing Brake Pads on a Car
Brake pads are a critical component of a vehicle’s braking system. Over time, the friction material on the pads wears down, reducing stopping effectiveness. Replacing the pads at appropriate intervals is a routine maintenance task that helps maintain consistent braking performance. While the exact procedure varies by vehicle design, the general process remains similar across most modern cars. This article outlines a methodical approach to removing old brake pads, inspecting rotors, and installing new ones, following the practices commonly observed in automotive service environments such as GearHead Garage.
Before beginning, it is important to understand that braking systems involve components under high stress and precise tolerances. Any work should be carried out with attention to safety, cleanliness, and proper tool usage. The following sections break down the process into distinct steps, each focusing on specific inspections and procedures. These steps are not intended as a substitute for a vehicle-specific service manual, but rather as a general framework that can be adapted to many common car models.
The overall process includes preparing the vehicle, removing the old pads, evaluating the condition of the rotors, installing new pads, and reassembling the system. Each stage requires careful handling to avoid damage to surrounding parts and to ensure that the braking system operates as intended after the work is completed.
Preparing the Vehicle and Gathering Tools
A well-organized workspace and the correct tools contribute to a smoother replacement process. The vehicle should be parked on a level surface, the engine turned off, and the parking brake engaged. For front or rear brake work, lifting the appropriate corner of the car safely is essential. A hydraulic jack and a pair of jack stands rated for the vehicle’s weight provide a stable working platform. Wheel chocks placed behind the opposite wheels add an extra layer of stability.
Tools typically needed for brake pad replacement include a lug wrench or impact gun, a socket set, a C‑clamp or brake caliper piston tool, a flathead screwdriver or pry bar, and a torque wrench for final lug nut tightening. Some vehicles may require special tools, such as a caliper wind-back tool for rear calipers with integrated parking brakes. Having a can of brake cleaner and a wire brush on hand allows for cleaning of components before reassembly. It is also advisable to have a container for catching any brake fluid that may seep from the master cylinder reservoir when the caliper piston is retracted.
Once the vehicle is lifted and secured, the wheel on the side being worked on is removed. The lug nuts are loosened before lifting the vehicle, then fully removed after the wheel is off the ground. The wheel is set aside, providing clear access to the brake caliper and rotor. At this point, the brake system should be visually inspected for any signs of fluid leakage, damaged hoses, or unusual wear patterns that may indicate underlying issues.
Removing the Old Brake Pads
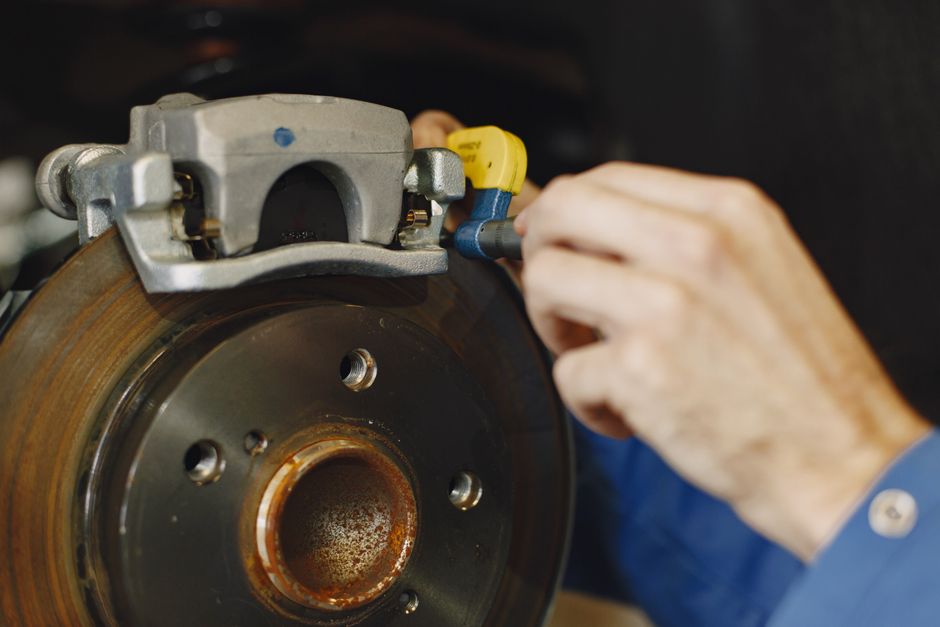
Accessing the brake pads generally requires removal or movement of the brake caliper. The caliper is the component that houses the pads and contains the pistons that press the pads against the rotor. On most vehicles, the caliper is secured either by two sliding pins or by bolts that attach it to the steering knuckle or caliper bracket. The exact fasteners vary, so consulting a service guide for the specific model is recommended.
After locating the caliper fasteners, they are removed using the appropriate socket or driver. In some designs, the sliding pins can be unscrewed, while others use bolts that require a wrench. Once the fasteners are removed, the caliper can be lifted or slid off the rotor. Care should be taken not to put stress on the brake hose, which remains attached. It is common practice to support the caliper using a wire hanger or a piece of rope to prevent it from hanging by the hose. If the caliper is difficult to remove, a gentle tap with a rubber mallet may help loosen it without damaging components.
With the caliper moved aside, the old brake pads become visible. They are usually held in place by clips, pins, or spring retainers. These retaining hardware pieces should be removed carefully, as they are often reused or replaced with new ones. The old pads can then be lifted out of the caliper bracket. Some pads may have wear indicators that produce a squealing sound when the pad is worn down; these indicators are typically attached to the backing plate. The condition of the old pads provides information about wear patterns—uneven wear may suggest a sticking caliper slider or a misaligned rotor.
Inspecting the Rotors
Before installing new pads, the rotors should be evaluated to determine whether they can remain in service or need resurfacing or replacement. Rotors that are warped, deeply grooved, or worn below the minimum thickness specification can compromise braking performance. A simple visual inspection reveals surface condition: minor rust or uniform discoloration is normal, but deep scoring, cracks, or blue spots indicating overheating warrant further attention.
Thickness measurement is a more precise way to assess rotor condition. Using a micrometer or caliper, the thickness at several points around the rotor is measured. The readings are compared to the manufacturer’s minimum thickness specification, which is often stamped on the rotor itself. If the rotor thickness is close to or below the minimum, replacement is typically recommended. In cases where the rotor surface is uneven but thickness is adequate, resurfacing (also called machining) may restore a smooth surface.
Lateral runout is another factor to consider. Runout refers to the side‑to‑side wobble of the rotor as it spins. Excessive runout can cause pedal pulsation and uneven pad wear. A dial indicator can measure runout at the rotor face. If runout exceeds the specified limit, the rotor may need to be replaced or, in some circumstances, resurfaced with a lathe designed to correct runout. It is important to note that even if a rotor appears acceptable visually, subtle thickness variations can affect braking feel over time.
Installing the New Brake Pads
Once the old pads are removed and the rotors are approved for continued use or replaced, the new pads can be installed. Before insertion, the caliper piston must be retracted to accommodate the thicker new pads. Retracting the piston is typically done using a C‑clamp or a dedicated piston compression tool. The reservoir cap on the master cylinder should be removed or loosened to allow displaced brake fluid to return without pressure buildup. As the piston is pushed back, fluid may slowly rise in the reservoir; monitoring the fluid level prevents overflow.
If the vehicle is equipped with rear disc brakes that have an integrated parking brake mechanism, the piston often requires twisting while being pushed back. A special wind‑back tool or a set of adapters is used for this operation. Attempting to force such a piston straight back can damage the park brake mechanism. Checking the vehicle’s service information for the correct retraction method is advisable.
With the piston fully retracted, the new pads can be placed into the caliper bracket. Many pads come with new hardware, such as anti‑rattle clips or shims, which should be installed as directed. The caliper is then repositioned over the pads and the rotor. The caliper fasteners are tightened to the specified torque value using a torque wrench. After reassembly, the brake pedal is pumped several times to bring the pads into contact with the rotor and restore proper pedal feel. It is normal for the pedal to feel soft initially until the piston is reseated.
Reassembly and Final Checks
After the brake pads are installed and the caliper is secured, the wheel can be remounted. The lug nuts are tightened in a star pattern to ensure even seating, and the torque wrench is used to achieve the manufacturer’s specification. Over‑ or under‑tightening lug nuts can lead to wheel distortion or loosening, so correct torque is important. Once all wheels on the same axle have been serviced, the vehicle is lowered from the jack stands.
Before driving, a thorough inspection of the brake system is performed. Brake fluid level in the master cylinder is checked and topped off if needed. The parking brake is tested for proper engagement and release. With the engine running, the brake pedal is pressed firmly to confirm that it feels firm and not spongy. A deliberate slow‑speed test drive in a safe area allows the brakes to be evaluated under light application. Many manufacturers recommend a bedding‑in procedure for new pads and rotors, which typically involves a series of moderate stops from moderate speeds to transfer a thin layer of pad material onto the rotor surface. Following the recommended bedding process can contribute to consistent braking performance over the life of the pads.
Regular inspection intervals vary depending on driving habits, vehicle weight, and environmental conditions. Some drivers find that pads wear more quickly in urban stop‑and‑go traffic than in highway driving. Keeping a record of pad thickness measurements over time helps establish a maintenance schedule that suits individual usage patterns. By following a systematic approach, the task of replacing brake pads becomes a manageable part of vehicle upkeep rather than an unexpected repair.